Sunday, August 7, 2016

Visual Explanation of SQL Joins

     SQL Joins are used to relate information in different tables. In short and crisp, there are 4 types of SQL joins. Inner, Left Outer, Right Outer and Full joins. Let’s see the differences between these four using Venn diagrams and then can see the SQL commands.
     Let’s say we have two sets of data in our relational database. Table A and Table B with some sort of relation specified by primary and foreign keys. The result of joining these tables together can be visually represented by following diagram:
See how each of the joins are represented.
Select all records from Table A and Table B, where the join condition                                                   is met.
Select all records from Table A, along with records from Table B for which                                                                 the join condition is met.
Select all records from Table B, along with records from Table A for which                                                                  the join condition is met.
Select all records from Table A and Table B, regardless of whether the join                                                                 condition is met or not.


Let's see them now in Tables & SQLs representation. If table A and table B exist like below.


Inner Join:
SQL Query is:
SELECT * FROM TableA
INNER JOIN TableB ON TableA.Name = TableB.Name;
Result will something look like...

Left Outer Join:
SQL Query is:

SELECT * FROM TableA
LEFT OUTER JOIN TableB ON TableA.name = TableB.name;
Result will something look like...

Right Outer Join:
SQL Query is:

SELECT * FROM TableA
RIGHT OUTER JOIN TableB ON TableA.name = TableB.name;
Result will something look like...

Full Join:
SQL Query is:

SELECT * FROM TableA
FULL JOIN TableB ON TableA.Name = TableB.Name;
Result will something look like...

     Likewise, you can create different types of joins just by adding few additional conditions to the SQL. For example, you can make Full Join as Full Outer Join just by adding a condition. 

     SQLs mentioned here are in ANSI 92/99 syntax. One of the good reasons to use ANSI syntax over the old conventional(+) join syntax is that, there are nil chances of accidentally creating a cartesian product. With more number of tables, there is a chance to miss an implicit join with older join syntax, however, with ANSI syntax you cannot miss any join as you must explicitly mention them. 

Happy Learning.. :) 

How To Escape Special Characters in Writing SQLs!


Oracle DB reserved below characters with specific meaning and purpose.
  1. _ (underscore) wildcard character is used to match exactly one character
  2. % (percentage) is used to match zero or more occurrences of any character
  3. ‘ (apostrophe, quote) is used to mark the value supplied
     If you want to insert the data with any of these characters or when performing string search with LIKE keyword, they are not interpreted literally and cause errors. One should escape them if these need to be interpreted as part of string value instead of a pre-defined meaning.
Let’s look at how each of these characters can be escaped.

Escape wildcard characters:
The LIKE keyword allows for string searches. As mentioned earlier, _ is used to match exactly one character.

1
2
SQL> SELECT name FROM emp WHERE id LIKE '%/_%' ESCAPE '/';
SQL> SELECT name FROM emp WHERE id LIKE '%\%%' ESCAPE '\';

Escape quotes('):
Quotes can be escaped in two ways. Let’s look at each.
  •      Use another quote to escape one quote. For example,
1
2
3
4
5
SQL> SELECT 'VENKI''S' AS WHOS FROM DUAL;

WHOS
-------
VENKIS
Another example is... 

1
2
3
4
5
SQL> SELECT 'VENKI''S LAPTOP: ''''VAIO''''' AS WHATS FROM DUAL;

WHATS
---------------------
VENKIS LAPTOP: ''VAIO''
  •        Use q expression. For example
1
2
SQL> SELECT q'[VENKI'S]' AS QUOTE_S FROM DUAL;
SQL> SELECT q'[VENKI'S LAPTOP: ''VAIO'']' AS QUOTE_S FROM DUAL;

Escape Ampersand (&):
This can be escaped in 3 ways. Let’s look at each.
  •        Use DEFINE. For example,
1
2
3
SQL> CREATE TABLE temp (name VARCHAR2(30));
SQL> SET DEFINE ~
SQL> INSERT INTO temp VALUES('Tom & Jerry');
Instead of ~, you can use ON or OFF to turn it on or off.
  •        Use ESCAPE. For example,
1
2
SQL> SET ESCAPE '\'
SQL> SELECT 'Tom \& Jerry' FROM DUAL;
You can define any other character also as escape character.
  •        Use SCAN. For example,
1
2
SQL> SET SCAN OFF;
SQL> SELECT 'Tom & Jerry' FROM DUAL;
But, this has been made obsolete. Please see for some more obsolete commands in Oracle DB https://docs.oracle.com/cd/B19306_01/server.102/b14357/apc.htm
  •        Another best way is to use to concatenation to escape the &.
1
SQL> SELECT 'Tom ' || '&' || ' Jerry' FROM DUAL;

Happy Learning… J

Saturday, August 6, 2016

Comparable vs Comparator examples to sort Objects!


What are these?
Both are interfaces. Comparable is from java.lang where as Comparator is from java.util packages.
A Comparable object is capable of comparing itself with another object. The class itself must implement the Comparable interface in order to be able to compare its instances.
A Comparator object is capable of comparing two different objects. The class is not comparing its instances, but some other class’s instances. Hence, the class in which this comparison is made must implement Comparator interface. However, this can be tweaked not to implement this interface when used in same class.

When to use what?
If there is a natural or default way of sorting objects then use Comparable.
If an object can be sorted on multiple ways and client is specifying on which parameter sorting should take place then use Comparator. Usually if you are not the author of a class, you wouldn’t have access to use Comparable so, the only option is to use Comparator.

Let’s see how we can sort primitive types or object array and list with a simple program.
PrimitiveSort.java
 package com.javaoracleadf.sorting;  
 import java.util.ArrayList;  
 import java.util.Arrays;  
 import java.util.Collections;  
 import java.util.List;  
 public class PrimitiveSort {  
   public static void main(String[] args) {  
     //sort int array  
     int[] intArr = {4,8,2,9};  
     Arrays.sort(intArr);  
     System.out.println(Arrays.toString(intArr));  
     //sorting String array  
     String[] strArr = {"A", "C", "B", "Z", "E"};  
     Arrays.sort(strArr);  
     System.out.println(Arrays.toString(strArr));  
     //sorting list of objects of Wrapper classes  
     List strList = new ArrayList();  
     strList.add("A");  
     strList.add("C");  
     strList.add("B");  
     strList.add("Z");  
     strList.add("E");  
     Collections.sort(strList);  
     for(String str: strList) System.out.print(" "+str);  
   }  
 }  
Output of the above program is:
 [2, 4, 8, 9]  
 [A, B, C, E, Z]  
 A B C E Z  
Now let’s try to sort an array of a custom class we have.
Employee.java
 package com.javaoracleadf.sorting;  
 public class Employee {  
   private int id;  
   private String name;  
   private int age;  
   private long salary;  
   public int getId() {  
     return id;  
   }  
   public String getName() {  
     return name;  
 }  
   public int getAge() {  
     return age;  
 }  
   public long getSalary() {  
     return salary;  
   }  
   public Employee(int id, String name, int age, int salary) {  
     this.id = id;  
     this.name = name;  
     this.age = age;  
     this.salary = salary;  
 }  
   public String toString() {  
     return "[id=" + this.id + ", name=" + this.name + ", age=" + this.age + ", salary=" + this.salary + "]";  
   }  
 }  
Here is the code I used to sort the array of Employee objects.
 //sorting custom object array  
 Employee[] empArr = new Employee[4];  
 empArr[0] = new Employee(10, "Manoj", 25, 10000);  
 empArr[1] = new Employee(20, "Anand", 29, 20000);  
 empArr[2] = new Employee(5, "Lakshmi", 35, 5000);  
 empArr[3] = new Employee(1, "Pavan", 32, 50000);  
   
 //sorting employees array using Comparable interface implementation  
 Arrays.sort(empArr);  
 System.out.println("Default Sorting of Employees list:\n"+Arrays.toString(empArr));  
When I tried to run this, it throws following runtime exception.
 Exception in thread "main" java.lang.ClassCastException: com.javaoracleadf.sorting.Employee cannot be cast to java.lang.Comparable  
   at java.util.ComparableTimSort.countRunAndMakeAscending(ComparableTimSort.java:290)  
   at java.util.ComparableTimSort.sort(ComparableTimSort.java:157)  
   at java.util.ComparableTimSort.sort(ComparableTimSort.java:146)  
   at java.util.Arrays.sort(Arrays.java:472)  
   at com.javaoracleadf.sorting.JavaSorting.main(JavaSorting.java:41)  
If you want to use Arrays or Collections sorting methods, your custom class should implement the Comparable interface. Also, you should override the method compareTo(T obj) in such a way that it returns a negative integer, zero, or a positive integer if “this” object is less than, equal, or greater than the object passed as an argument. After implementing Comparable interface, resulting Employee.java file look like below.
Employee.java
 package com.javaoracleadf.sorting;  
 import java.util.Comparator;  
 public class Employee implements Comparable {  
   private int id;  
   private String name;  
   private int age;  
   private long salary;  
   public int getId() {  
     return id;  
   }  
   public String getName() {  
     return name;  
 }  
   public int getAge() {  
     return age;  
 }  
   public long getSalary() {  
     return salary;  
   }  
   public Employee(int id, String name, int age, int salary) {  
     this.id = id;  
     this.name = name;  
     this.age = age;  
     this.salary = salary;  
 }  
   @Override  
   public int compareTo(Employee emp) {  
     //let's sort the employee based on id in ascending order  
     //returns a negative integer, zero, or a positive integer as this employee id  
     //is less than, equal to, or greater than the specified object.  
     return (this.id - emp.id);  
   }  
   public String toString() {  
     return "[id=" + this.id + ", name=" + this.name + ", age=" + this.age + ", salary=" + this.salary + "]";  
   }  
 }  
If I execute the above sorting logic, it sorts the objects like below.
 Default Sorting of Employees list:  
 [[id=1, name=Pavan, age=32, salary=50000], [id=5, name=Lakshmi, age=35, salary=5000], [id=10, name=Manoj, age=25, salary=10000], [id=20, name=Anand, age=29, salary=20000]]  
As you can see that Employees objects array is sorted by id in ascending order.

But, in the other scenarios, sorting is needed based on different parameters. For example, as a manager, he would like to sort the employees based on Salary. As a HR, he would like to sort them based on the age. In this situation, using Comparator interface is the best fit because Comparable.compareTo(Object o) method can sort based on one field only and we can’t chose the field on which we want to sort the Object.
Comparator interface’s compare(Object o1, Object o2) method need to be implemented which takes two Object arguments and it should be implemented in such a way that it returns negative integer if first argument is less than the second one and returns zero if they are equal and positive integer if first argument is greater than second one.
After implementing Comparator’s methods, resulting Employee.java file look like below.
Employee.java
 package com.javaoracleadf.sorting;  
 import java.util.Comparator;  
 public class Employee implements Comparable {  
   private int id;  
   private String name;  
   private int age;  
   private long salary;  
   public int getId() {  
     return id;  
   }  
   public String getName() {  
     return name;  
 }  
   public int getAge() {  
     return age;  
 }  
   public long getSalary() {  
     return salary;  
 }  
   public Employee(int id, String name, int age, int salary) {  
     this.id = id;  
     this.name = name;  
     this.age = age;  
     this.salary = salary;  
 }  
   @Override  
   public int compareTo(Employee emp) {  
     //let's sort the employee based on id in ascending order  
     //returns a negative integer, zero, or a positive integer as this employee id  
     //is less than, equal to, or greater than the specified object.  
     return (this.id - emp.id);  
   }  
   public String toString() {  
     return "[id=" + this.id + ", name=" + this.name + ", age=" + this.age + ", salary=" + this.salary + "]";  
   }  
   /**  
    * Comparator to sort employees list or array in order of Salary  
    */  
   public static Comparator SalaryComparator = new Comparator() {  
     @Override  
     public int compare(Employee e1, Employee e2) {  
       return (int) (e1.getSalary() - e2.getSalary());  
     }  
 };  
   /**  
    * Comparator to sort employees list or array in order of Age  
    */  
   public static Comparator AgeComparator = new Comparator() {  
     @Override  
     public int compare(Employee e1, Employee e2) {  
       return e1.getAge() - e2.getAge();  
     }  
 };  
   /**  
    * Comparator to sort employees list or array in order of Name  
    */  
   public static Comparator NameComparator = new Comparator() {  
     @Override  
     public int compare(Employee e1, Employee e2) {  
       return e1.getName().compareTo(e2.getName());  
     }  
 };  
 }  
We can use these comparators to pass as argument to sort function of Arrays and Collections classes.
 //sort employees array using Comparator by Salary  
 Arrays.sort(empArr, Employee.SalaryComparator);  
 System.out.println("Employees list sorted by Salary:\n"+Arrays.toString(empArr));  
   
 //sort employees array using Comparator by Age  
 Arrays.sort(empArr, Employee.AgeComparator);  
 System.out.println("Employees list sorted by Age:\n"+Arrays.toString(empArr));  
   
 //sort employees array using Comparator by Name  
 Arrays.sort(empArr, Employee.NameComparator);  
 System.out.println("Employees list sorted by Name:\n"+Arrays.toString(empArr));  
Here is the output of the above code snippet:
 Employees list sorted by Salary:  
 [[id=5, name=Lakshmi, age=35, salary=5000], [id=10, name=Manoj, age=25, salary=10000], [id=20, name=Anand, age=29, salary=20000], [id=1, name=Pavan, age=32, salary=50000]]  
   
 Employees list sorted by Age:  
 [[id=10, name=Manoj, age=25, salary=10000], [id=20, name=Anand, age=29, salary=20000], [id=1, name=Pavan, age=32, salary=50000], [id=5, name=Lakshmi, age=35, salary=5000]]  
   
 Employees list sorted by Name:  
 [[id=20, name=Anand, age=29, salary=20000], [id=5, name=Lakshmi, age=35, salary=5000], [id=10, name=Manoj, age=25, salary=10000], [id=1, name=Pavan, age=32, salary=50000]]  
We can also create separate class that implements Comparator interface and then use it.

EmployeeComparatorByIdAndName.java
 package com.javaoracleadf.sorting;  
 import java.util.Comparator;  
 public class EmployeeComparatorByIdAndName implements Comparator {  
   @Override  
   public int compare(Employee o1, Employee o2) {  
     int flag = o1.getId() - o2.getId();  
     if(flag==0) flag = o1.getName().compareTo(o2.getName());  
     return flag;  
 }  
 }  
test class where we are using different ways to sort Objects in java.
JavaObjectSorting.java
 package com.javaoracleadf.sorting;  
 import java.util.Arrays;  
 public class JavaObjectSorting {  
   /**  
    * This class shows how to sort custom objects array/list  
    * implementing Comparable and Comparator interfaces  
    * @param args  
    */  
   public static void main(String[] args) {  
     //sorting custom object array  
     Employee[] empArr = new Employee[4];  
     empArr[0] = new Employee(10, "Manoj", 25, 10000);  
     empArr[1] = new Employee(20, "Anand", 29, 20000);  
     empArr[2] = new Employee(5, "Lakshmi", 35, 5000);  
     empArr[3] = new Employee(1, "Pavan", 32, 50000);  
     //sorting employees array using Comparable interface implementation  
     Arrays.sort(empArr);  
     System.out.println("Default Sorting of Employees list:\n"+Arrays.toString(empArr));  
     //sort employees array using Comparator by Salary  
     Arrays.sort(empArr, Employee.SalaryComparator);  
     System.out.println("Employees list sorted by Salary:\n"+Arrays.toString(empArr));  
     //sort employees array using Comparator by Age  
     Arrays.sort(empArr, Employee.AgeComparator);  
     System.out.println("Employees list sorted by Age:\n"+Arrays.toString(empArr));  
     //sort employees array using Comparator by Name  
     Arrays.sort(empArr, Employee.NameComparator);  
     System.out.println("Employees list sorted by Name:\n"+Arrays.toString(empArr));  
     //Employees list sorted by ID and then name using Comparator class  
     empArr[0] = new Employee(1, "Manoj", 25, 10000);  
     Arrays.sort(empArr, new EmployeeComparatorByIdAndName());  
     System.out.println("Employees list sorted by ID and Name:\n"+Arrays.toString(empArr));  
 }  
 }  
Here is the output of the above program:
 Default Sorting of Employees list:  
 [[id=1, name=Pavan, age=32, salary=50000], [id=5, name=Lakshmi, age=35, salary=5000], [id=10, name=Manoj, age=25, salary=10000], [id=20, name=Anand, age=29, salary=20000]]  
   
 Employees list sorted by Salary:  
 [[id=5, name=Lakshmi, age=35, salary=5000], [id=10, name=Manoj, age=25, salary=10000], [id=20, name=Anand, age=29, salary=20000], [id=1, name=Pavan, age=32, salary=50000]]  
   
 Employees list sorted by Age:  
 [[id=10, name=Manoj, age=25, salary=10000], [id=20, name=Anand, age=29, salary=20000], [id=1, name=Pavan, age=32, salary=50000], [id=5, name=Lakshmi, age=35, salary=5000]]  
   
 Employees list sorted by Name:  
 [[id=20, name=Anand, age=29, salary=20000], [id=5, name=Lakshmi, age=35, salary=5000], [id=10, name=Manoj, age=25, salary=10000], [id=1, name=Pavan, age=32, salary=50000]]  
   
 Employees list sorted by ID and Name:  
 [[id=1, name=Manoj, age=25, salary=10000], [id=1, name=Pavan, age=32, salary=50000], [id=5, name=Lakshmi, age=35, salary=5000], [id=10, name=Manoj, age=25, salary=10000]]  
Happy Learning.. :) 

Friday, March 25, 2016

Returning Complex Data Types from ADF SOAP Web Services!

We already discussed how easy it is to expose ADF Business Components as SOAP Web Services. We have also discussed on how to expose the custom methods on to SOAP Web Services. See blog Quickly Creating, Deploying and Testing SOAP WebServices in ADF for more details. 

This blog is focused to show what data types ADF SOAP Web Services support.
Unlike ADF Client Interface, Service Interface supports a more narrow set of data types for custom method parameters and return values and is limited to:
  • Java primitive types and their object wrapper types (for example int, Integer);
  • java.lang.String;
  • java.math.BigDecimal;
  • java.math.BigInteger;
  • java.sql.Date;
  • java.sql.Time;
  • java.sql.Timestamp;
  • java.util.Date;
  • oracle.jbo.AttributeList;
  • oracle.jbo.domain.BlobDomain;
  • oracle.jbo.domain.Char;
  • oracle.jbo.domain.ClobDomain;
  • oracle.jbo.domain.DBSequence;
  • oracle.jbo.domain.Date;
  • oracle.jbo.domain.NClobDomain;
  • oracle.jbo.domain.Number;
  • oracle.jbo.domain.Timestamp;
  • oracle.jbo.domain.TimestampLTZ;
  • oracle.jbo.domain.TimestampTZ;
  • oracle.jbo.server.ViewRowImpl or any subtype;
  • java.util.List, where aType is any of the service-interface supported data types, including Java primitive type.
NOTE: The service interface specifically does not support Java Map collection. This means it is not possible to return a collection of objects that are of different types. The service interface does not support custom classes as parameters or return types.

Assume the ADF SOAP WS EmployeesService is already available with basic CRUD operations, one simple custom method which returns String type. This was an ADF web application with Employees and Departments tables of HR schema. Having said, let’s look at few examples through which you can return few complex types.

Example to return the list of Department rows:

Code is written like below.

Open EmployeesAM – Service Interface tab – click on pencil icon in Service Interface Custom Methods section.
In Service Custom Methods window, shuttle the new custom methods to right side. Expand the method declaration and ensure to map both Element Java Type and Element View Object as shown below. Once mapped, click OK.


Example to return the list of custom VO rows:

Create a Programmatic VO which will be populated programmatically. 
Now, add three variables in the VO. DepartmentName, ManagerId and IsManager.

Generate Necessary VOImpl and RowImpl classes and set data types for the variables.
Remember to make these variables set AlwaysUpdatable as below.

Keep clicking Next and say Finish. Also, make sure to add this VO instance to EmployeesAM.
Now write a method in AMImpl class which has a code below. This method is an operation of the Web Service which will return the List of Complex type.
As shown earlier, expose this method on to Service Interface.
 
Deploy the EmployeesService as described in my blog Quickly Creating, Deploying and Testing SOAP WebServices in ADF.
Test the first service operation. Chose getDepartmentManagerDetails operation and click Invoke.
It gives the response like below.
Now chose 2nd operation getDeptMgrDetailsWithCustomReturn and click Invoke button. 
It provides the response like below.
So by using ViewRowImpl, we can return List of complex type object which can cater requirement of having complex type returned from the service.


Happy Learning.. :) 

Quickly Creating, Deploying and Testing SOAP WebServices in ADF!

JDeveloper allows you to expose Application Modules as Web Services. The Service Enabled Application Module exposes the View Objects, Custom Methods, Built-In Data Manipulation Operations, and Specialized Find methods based on named view criteria to be used by the client.
In this blog, I will cover
  • Exposing Application Module as SOAP Service. In this, expose
    • View Object
    • Built-In Data Manipulation Operations on View Object
    • Custom methods
  •  Deploying Service locally in the Integrated Weblogic Server
  •  Deploying Service in the Standalone Weblogic Server
  •  Testing the Service operations

Securing this Web Service will be discussed in my next blog... 

Created a Fusion Web Application project using Departments and Employee tables of HR schema and it is structured like below.
I have created one method in EmployeesAMImpl.java. It takes DepartmentId as input and returns DepartmentName.
We are all done with code part. Now let’s quickly create service interface and expose the web service.

Exposing Application Module as Service Interface:

Open EmployeesAM and Web Services tab. Click on green + icon.
It opens up Create Service Interface popup. In Step 1, we can set Web Service Name, and Target Namespace, enable option to generate asynchronous methods, by default it supports synchronous service methods. Also, generates control hint operations.
In Step 2, if we have any custom methods defined in Application Module then we can expose these methods to service interface.
Select the method which you want to expose on Web Service and shuttle them to right side window. If ‘Include Warnings in Return Service Data Object’ is not selected, no informational messages will be returned with the service response. This option is not enabled when method is returning view rows or list of view rows. When the method returns view rows, the underlying view object determines whether the method supports warnings or not. When this option is enabled on View Object, JDeveloper generates appropriate wrappers as the return objects, and the wrappers contain the actual method return and the informational messages.
In Step 3, we can expose some built in methods on the view object. First shuttle the View Objects to right and highlight it to enable the built-in methods. Choose the operations which you want to expose. Also, in View Criteria Find operations tab, you can add view criterias for find operations.
Click on Finish to create service interface and all required files.
Project now looks like below.
In order to have a nicer looking URL for the WebService endpoint as well as a better looking name for the application itself, we will open the Project Properties editor for the Model project, and open the Java EE Application node.

Deploy WebService locally in a Integrated WLS Server:
This is easier than deploying on a standalone application server instance. Run EmployeeServiceImpl.java file to deploy and test this Web Service. 
The Integrated WLS server is started, when not already running and the ADF BC application is deployed on it. The Application’s Context Root and the Name of the Service Interface, together with localhost:7101, make up the endpoint URL for the Web Service.

Create the standalone application server:
Go through the page  to know how standalone application server can be created. 

There is one important setting that you need to apply to the WLS domain that you will be deploying the ADF BC Web Service to. This setting is required to prevent the “Null Password given” error message that otherwise results when we access the web service. Simply put this setting instructs the WLS domain to accept passwords in deployed application.

Open the setDomainEnv.cmd or setDomainEnv.sh file – depending on your operating system – in the directory [WLS_HOME]\user_project\domain\[your target domain]\bin and add the following line after the first occurrence of set JAVA_PROPERTIES.

"set JAVA_PROPERTIES=%JAVA_PROPERTIES% -Djps.app.credential.overwrite.allowed=true"


Pre-Requisites to deploy your application to standalone server:
Next is to see how Service Interface can be deployed on a standalone application server. Let’s prepare it for deployment. i.e., create the deployment profiles, setting up the standalone and et.c.,
Right 
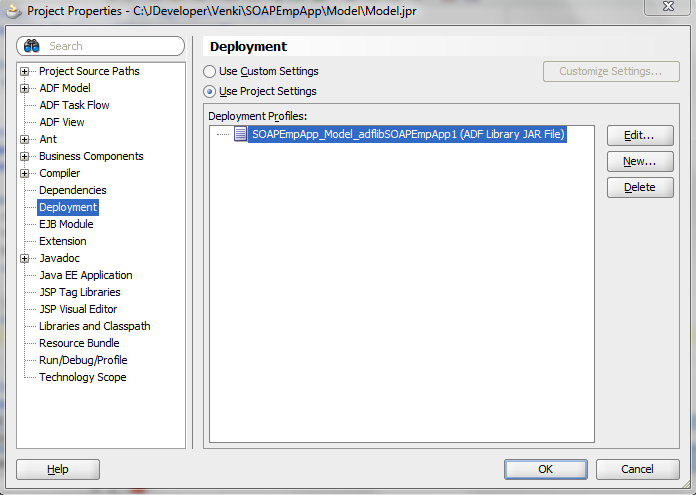
click on Model project and chose Project Properties. 
Chose Deployment in left region and click New icon in right side region.
Select Archive Type as Business Components Service Interface, provide some name to the Deployment profile and click OK. Deployment Profile is created like below.
If you happened to deploy your application to standalone earlier, then you can skip this step. This step is to create the EAR deployment profile. Open Application Properties window.
Chose Deployment in left region, highlight application deployment profile and click Edit.
 
In the EAR Deployment Profile editor, select the node Application Assembly. Check the checkbox for Middle Tier in the EmployeeService deployment profile (of type Business Components Service Interface) that we have previously created. Click OK.
Back in the Deployment page for the Application Properties, make sure that the checkbox Auto Generate and Synchronize weblogic-jdbc.xml Descriptors During Deployment is unchecked. Click OK.

Deploy EAR to Standalone application Server:
We are now ready to deploy the application to a standalone Weblogic Server domain. Note that I am assuming that you already have configured a connection to the target WLS domain. We will use that connection for the upcoming deployment.
Open the context menu for the Application – the same dropdown we used for creating the deployment profile for the application. Open the submenu Deploy and Select the SOAPEmpApp_application1 deployment profile.

The Deployment Wizard appears.
In the first step, elect to deploy to Application Server:
Press Next. In the 2nd step, select the connection to the target Application Server.
Press Next. Select the radio button Deploy to selected instances in the domain and select the target server(s) to which you want to deploy the ADF BC Service application. Make sure that the radio button Deploy as standalone Application is selected.
Press Next. The Summary appears. After a final review, press Finish to start the real deployment.

Testing the Web Service:
You can open that URL in your browser. Observe that sync and async built-in methods and custom methods are available on Service Interface.
Let’s try testing a couple of operations.
Chose getEmployees operation, input EmployeeId as 120 and click Invoke.
It returns the response like below.
Let’s test the custom method. Choose getDeptName from Operation drop down. Enter deptId as 70 and click Invoke button.
It gives the response like below with Department Name.

References:


Happy learning... :)