Friday, March 25, 2016

Returning Complex Data Types from ADF SOAP Web Services!

We already discussed how easy it is to expose ADF Business Components as SOAP Web Services. We have also discussed on how to expose the custom methods on to SOAP Web Services. See blog Quickly Creating, Deploying and Testing SOAP WebServices in ADF for more details. 

This blog is focused to show what data types ADF SOAP Web Services support.
Unlike ADF Client Interface, Service Interface supports a more narrow set of data types for custom method parameters and return values and is limited to:
  • Java primitive types and their object wrapper types (for example int, Integer);
  • java.lang.String;
  • java.math.BigDecimal;
  • java.math.BigInteger;
  • java.sql.Date;
  • java.sql.Time;
  • java.sql.Timestamp;
  • java.util.Date;
  • oracle.jbo.AttributeList;
  • oracle.jbo.domain.BlobDomain;
  • oracle.jbo.domain.Char;
  • oracle.jbo.domain.ClobDomain;
  • oracle.jbo.domain.DBSequence;
  • oracle.jbo.domain.Date;
  • oracle.jbo.domain.NClobDomain;
  • oracle.jbo.domain.Number;
  • oracle.jbo.domain.Timestamp;
  • oracle.jbo.domain.TimestampLTZ;
  • oracle.jbo.domain.TimestampTZ;
  • oracle.jbo.server.ViewRowImpl or any subtype;
  • java.util.List, where aType is any of the service-interface supported data types, including Java primitive type.
NOTE: The service interface specifically does not support Java Map collection. This means it is not possible to return a collection of objects that are of different types. The service interface does not support custom classes as parameters or return types.

Assume the ADF SOAP WS EmployeesService is already available with basic CRUD operations, one simple custom method which returns String type. This was an ADF web application with Employees and Departments tables of HR schema. Having said, let’s look at few examples through which you can return few complex types.

Example to return the list of Department rows:

Code is written like below.

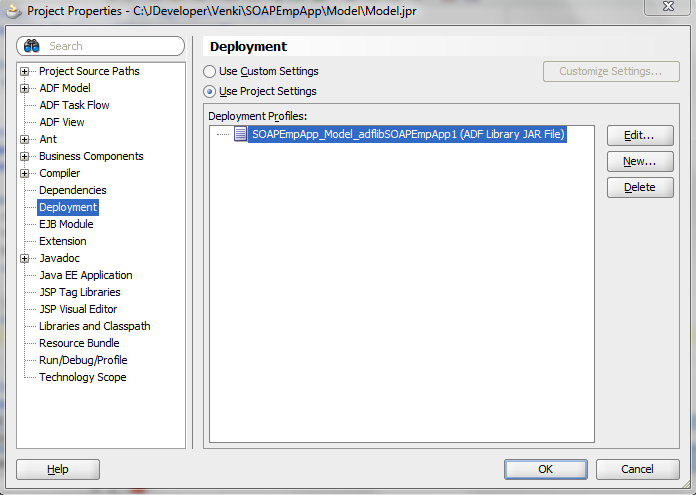
Open EmployeesAM – Service Interface tab – click on pencil icon in Service Interface Custom Methods section.
In Service Custom Methods window, shuttle the new custom methods to right side. Expand the method declaration and ensure to map both Element Java Type and Element View Object as shown below. Once mapped, click OK.


Example to return the list of custom VO rows:

Create a Programmatic VO which will be populated programmatically. 
Now, add three variables in the VO. DepartmentName, ManagerId and IsManager.

Generate Necessary VOImpl and RowImpl classes and set data types for the variables.
Remember to make these variables set AlwaysUpdatable as below.

Keep clicking Next and say Finish. Also, make sure to add this VO instance to EmployeesAM.
Now write a method in AMImpl class which has a code below. This method is an operation of the Web Service which will return the List of Complex type.
As shown earlier, expose this method on to Service Interface.
 
Deploy the EmployeesService as described in my blog Quickly Creating, Deploying and Testing SOAP WebServices in ADF.
Test the first service operation. Chose getDepartmentManagerDetails operation and click Invoke.
It gives the response like below.
Now chose 2nd operation getDeptMgrDetailsWithCustomReturn and click Invoke button. 
It provides the response like below.
So by using ViewRowImpl, we can return List of complex type object which can cater requirement of having complex type returned from the service.


Happy Learning.. :) 

Quickly Creating, Deploying and Testing SOAP WebServices in ADF!

JDeveloper allows you to expose Application Modules as Web Services. The Service Enabled Application Module exposes the View Objects, Custom Methods, Built-In Data Manipulation Operations, and Specialized Find methods based on named view criteria to be used by the client.
In this blog, I will cover
  • Exposing Application Module as SOAP Service. In this, expose
    • View Object
    • Built-In Data Manipulation Operations on View Object
    • Custom methods
  •  Deploying Service locally in the Integrated Weblogic Server
  •  Deploying Service in the Standalone Weblogic Server
  •  Testing the Service operations

Securing this Web Service will be discussed in my next blog... 

Created a Fusion Web Application project using Departments and Employee tables of HR schema and it is structured like below.
I have created one method in EmployeesAMImpl.java. It takes DepartmentId as input and returns DepartmentName.
We are all done with code part. Now let’s quickly create service interface and expose the web service.

Exposing Application Module as Service Interface:

Open EmployeesAM and Web Services tab. Click on green + icon.
It opens up Create Service Interface popup. In Step 1, we can set Web Service Name, and Target Namespace, enable option to generate asynchronous methods, by default it supports synchronous service methods. Also, generates control hint operations.
In Step 2, if we have any custom methods defined in Application Module then we can expose these methods to service interface.
Select the method which you want to expose on Web Service and shuttle them to right side window. If ‘Include Warnings in Return Service Data Object’ is not selected, no informational messages will be returned with the service response. This option is not enabled when method is returning view rows or list of view rows. When the method returns view rows, the underlying view object determines whether the method supports warnings or not. When this option is enabled on View Object, JDeveloper generates appropriate wrappers as the return objects, and the wrappers contain the actual method return and the informational messages.
In Step 3, we can expose some built in methods on the view object. First shuttle the View Objects to right and highlight it to enable the built-in methods. Choose the operations which you want to expose. Also, in View Criteria Find operations tab, you can add view criterias for find operations.
Click on Finish to create service interface and all required files.
Project now looks like below.
In order to have a nicer looking URL for the WebService endpoint as well as a better looking name for the application itself, we will open the Project Properties editor for the Model project, and open the Java EE Application node.

Deploy WebService locally in a Integrated WLS Server:
This is easier than deploying on a standalone application server instance. Run EmployeeServiceImpl.java file to deploy and test this Web Service. 
The Integrated WLS server is started, when not already running and the ADF BC application is deployed on it. The Application’s Context Root and the Name of the Service Interface, together with localhost:7101, make up the endpoint URL for the Web Service.

Create the standalone application server:
Go through the page  to know how standalone application server can be created. 

There is one important setting that you need to apply to the WLS domain that you will be deploying the ADF BC Web Service to. This setting is required to prevent the “Null Password given” error message that otherwise results when we access the web service. Simply put this setting instructs the WLS domain to accept passwords in deployed application.

Open the setDomainEnv.cmd or setDomainEnv.sh file – depending on your operating system – in the directory [WLS_HOME]\user_project\domain\[your target domain]\bin and add the following line after the first occurrence of set JAVA_PROPERTIES.

"set JAVA_PROPERTIES=%JAVA_PROPERTIES% -Djps.app.credential.overwrite.allowed=true"


Pre-Requisites to deploy your application to standalone server:
Next is to see how Service Interface can be deployed on a standalone application server. Let’s prepare it for deployment. i.e., create the deployment profiles, setting up the standalone and et.c.,
Right click on Model project and chose Project Properties. 
Chose Deployment in left region and click New icon in right side region.
Select Archive Type as Business Components Service Interface, provide some name to the Deployment profile and click OK. Deployment Profile is created like below.
If you happened to deploy your application to standalone earlier, then you can skip this step. This step is to create the EAR deployment profile. Open Application Properties window.
Chose Deployment in left region, highlight application deployment profile and click Edit.
 
In the EAR Deployment Profile editor, select the node Application Assembly. Check the checkbox for Middle Tier in the EmployeeService deployment profile (of type Business Components Service Interface) that we have previously created. Click OK.
Back in the Deployment page for the Application Properties, make sure that the checkbox Auto Generate and Synchronize weblogic-jdbc.xml Descriptors During Deployment is unchecked. Click OK.

Deploy EAR to Standalone application Server:
We are now ready to deploy the application to a standalone Weblogic Server domain. Note that I am assuming that you already have configured a connection to the target WLS domain. We will use that connection for the upcoming deployment.
Open the context menu for the Application – the same dropdown we used for creating the deployment profile for the application. Open the submenu Deploy and Select the SOAPEmpApp_application1 deployment profile.

The Deployment Wizard appears.
In the first step, elect to deploy to Application Server:
Press Next. In the 2nd step, select the connection to the target Application Server.
Press Next. Select the radio button Deploy to selected instances in the domain and select the target server(s) to which you want to deploy the ADF BC Service application. Make sure that the radio button Deploy as standalone Application is selected.
Press Next. The Summary appears. After a final review, press Finish to start the real deployment.

Testing the Web Service:
You can open that URL in your browser. Observe that sync and async built-in methods and custom methods are available on Service Interface.
Let’s try testing a couple of operations.
Chose getEmployees operation, input EmployeeId as 120 and click Invoke.
It returns the response like below.
Let’s test the custom method. Choose getDeptName from Operation drop down. Enter deptId as 70 and click Invoke button.
It gives the response like below with Department Name.

References:


Happy learning... :) 

Monday, March 14, 2016

Working With RowCount(s) in Oracle ADF!

In ADF applications, people often come across use cases where row counts are to be shown/used. For example,
  • Before or after the table, show the count of number of rows displayed
  • Use counts for writing simple UI logic
  • Show the page header or footer with aggregated summary information.

In this blog, I show you the different options to achieve these requirements. Also, I will explain pros and cons of each of these options. Being an ADF developer, you should understand the concepts before implementing them to avoid unexpected behavior.

ViewObjectImpl.java has few methods to work with row counts.
getRowCount()
getEstimatedRowCount()
getFetchedRowCount()


getRowCount() retrieves all the records from View Object by executing View Object’s Query. The count is calculated by traversing the View Object using next() method until the last record is retrieved. It does this every time you invoke this method so, it involves DB trip and consumes memory. If you are working with a large number of rows, or if your application demands fast response, use getEstimatedRowCount() to obtain a quicker count as this method hinders the applications performance.

getEstimatedRowCount() retrieves the count by hitting getQueryHitCount() method which runs the select count(*) on the VO Query. For the first time, it queries the DB table using a select * from table query and store the count in Middle-Tier. After that, it keeps on adjusting the count within the Middle-Tier whenever row insertions or deletions are performed on the View Object. This way, it prevents the db trip and is much faster.
     The downside of this method is it may not be accurate sometimes. Specially, in the scenarios where there are possibilities of data insertions or deletions from backend by some other application concurrently.

getFechedRowCount() provides you the number of rows fetched from Result Set at a given point of time.

Hopefully this helps to understand the differences between these methods for row count.

     Sometimes, you tend to use above count methods to write simple UI logic. These operations are expensive and have a negative impact on performance especially when used for simple existence checks (like count > 0, count == 1 et.c.,). These can be performed by simply looking at the View Object . For example, to test if the VO has at least one row, we can simply look at the current row, previous and next rows to see if any of these are not null. There is no need to execute a potentially expensive SQL query for these simple checks.
     You can write a utility class once and use them in all the places of your project to verify this. Write them as static methods so you can use them without instantiating the class. For example,
  • to verify if View Object contains no rows

        public static boolean containsNoRows(ViewObject vo) {
      if (vo == null) return true;
      RowSet rs = vo.getRowSet();
      if (rs == null) return true;
      return (rs.getCurrentRow() == null && (!rs.hasNext() && !rs.hasPrevious());
     }
  • to verify if View Object contains at least one row

        public static boolean containsAtleastOneRow(ViewObject vo){
      if (vo == null) return false;
      RowSet rs = vo.getRowSet();
if (rs == null) return false;
return (rs.getCurrentRow() != null || rs.hasNext() || rs.hasPrevious());
     }
  • to verify if View Object contains more than one row

        public static boolean containsMoreThanOneRow(ViewObject vo) {
       if (vo == null) return false;
       RowSet rs = vo.getRowSet();
       if(rs == null) return false;
       if(containsNoRows(vo)) return false;
       Boolean containsMoreThanOneRow = false;
       RowSetIterator rowIter = rs.createRowSetIterator(null);
 if (rowIter.hasNext()) {
    rowIter.next();
    if(rowIter.hasNext()) containsMoreThanOneRow = true;
 }
 rowIter.closeRowSetIterator();
 return containsMoreThanOneRow;
      }
  • to verify if View Object contains exactly one row

         public static boolean containsExactlyOneRow(ViewObject vo) {
       if(vo == null) return false;
       RowSet rs = vo.getRowSet();
       if(rs == null) return false;
       if(containsNoRows(vo)) return false;
       if(containsMoreThanOneRow(vo)) return false;
       return true;
      }

     Above methods would only work for basic checks. However, if you have to show the summary information either in the page header or footer, this wouldn’t work. Again, invoking getRowCount(), getEstimatedRowCount() would yield performance issues.
For example, for an admin user, you want to show the number of employees in each department in the page footer. Executing the VO query by passing different department id and getting the row count is not something that is suggestible. This will even worse if the VO has large volume of data.

     Instead, you can go for SQL based read-only view object just for this summary information. In-order to demo this, I had built a sample workspace in JDeveloper 11.1.7.1.0 using the default HR schema in Oracle DB.

     Click Create New View Object. Once the Create View Object popup is displayed, provide Name, chose ‘Read-only access through SQL query’ option at the bottom and click Next.


     Provide the SQL in ‘Query Statement’ box, and click Test button to validate the SQL. Ensure Query is valid and click Next.


     Click Next to skip the Bind Variables section as this doesn’t require any bind variables. Click Next in Attribute Mappings section to accept defaults. Click Next in Attributes section to accept defaults. You can modify the attributes settings as shown below, but I would accept the defaults and click Next.


     Keep clicking Next to accept defaults and click Finish. Now, add this VO to EmployeeAM as shown below.


     Test this through AM tester to verify the results. Please refer my other blog to know how to test the Business Logic through AMTester in Jdeveloper.


     You can add this data to the UI. This is pretty quick as this doesn’t fetch all rows from Employee/Departments tables. It just fetches the count. I have seen a lot of instances where this approach has worked tremendously. You can indeed follow the same approach to show the rows count before or after the table.


Thank you for reading through!

Sunday, March 13, 2016

Test your Business Logic with AMTester (BC4J Tester) in Oracle ADF

     This blog describes how to use the Application Module Tester provided in JDeveloper to test all your business logic. This will let the developer to run, debug and test all the business logic before the designers have worked on Client UI. Also, Model developers don’t have to wait until UI developers finish their job and to report issues in model layer. This reduces the dependency.

     I feel it as a best practice to do in each project. AMTester starts up really fast when compared with full UI web application and it speeds up the debugging time.

     In this blog, I plan to show how to test View Object, View Link, View Criteria and Service Methods. In-order to demo these, I had built a sample workspace in JDeveloper 11.1.7.1.0 using the default HR schema in Oracle DB. Below is what I have in my test Model project and the Application Module definition.


     As you see above, I added EmployeeVO to EmployeeAM. Also, added DepartmentVO and JobsVO to EmployeeVO through view links I created. Also, defined one new service method on EmployeeAM and made it available to Client UI’s. To do so, navigated to Java tab of EmployeeAM definition and shuttled it. Now AM definition is like below.

     Also, defined one new View Criteria on EmployeeVO to return all employees whose first name starts with what user inputs. VC definition is like below.

     Now, let’s proceed testing these...

     Right click on EmployeeAM in Application Navigator window, and chose Run/Debug to run/debug the AMTester respectively as shown below.

     As mentioned earlier, AMTester UI comes up fast and it appears like below.


     To test service methods, right click on EmployeeAM and click Show. EmployeeAM tab appears in right side region. The Method drop down lists all the service methods exposed to client UI. Choose the method you want to test and click on Execute button by providing the input parameters. Result and Return values are shown in the bottom of the page.


     To test View Object, right click on Employee VO instance and click Show. This shows the record by record view of the data. Choose ‘Show Table’ option to view the data in a tabular format. Use right or left arrow marks to move forward or backward in the data set. Click + to insert new VO row. Click X icon remove a row. Click tick icon to validate the data before committing it to DB. You can explore the other options.


     Observe, Find option in above screen print. Click on this option to test View Criteria. Now the screen appears like below.

     
     Shuttle the EmployeeVOCriteria from Available section to Selected Section and click Find button at the bottom. A small popup appears with the list of Bind Variables for which you need to provide input values.


     Once value is provided, click OK. Employees whose first name starts with s are listed like below.


     To test View Link, right click on the view links say EmployeeVOToDepartmentVO, EmployeeVOToJobsVO and click Show. It shows both Parent and related Child Objects data together as shown below.


     This may not look as much to you, but the advantage of the Application Module Tester is that you can debug the code in the application module methods or view object operation easily. You can set needed variables when calling the methods and use the outcome of the operations in calls to other operations. This way you can easily test the whole business logic without the need to have an UI present.


Thank you for reading through!!!